
The Honeywell TH3210U2004 is a non-programmable thermostat designed for straightforward use and precise comfort control. This guide provides step-by-step installation, configuration, and maintenance instructions.
Overview of the Honeywell TH3210U2004 Thermostat
The Honeywell TH3210U2004 is a non-programmable thermostat designed for simplicity and ease of use. Featuring a clear digital display and intuitive controls, it offers precise temperature management. This thermostat is compatible with a wide range of heating, cooling, and heat pump systems, making it versatile for various home setups. It includes the Universal Mounting System (UWP), which simplifies installation and ensures compatibility with most standard wiring configurations. The device is energy-efficient and operates on 20-30 Vac, supporting up to 2 heat and 1 cool stages for heat pumps, and 1 heat and 1 cool stage for conventional systems. Its compact design and decorative cover plate allow it to blend seamlessly into any home decor. This thermostat is ideal for homeowners seeking a reliable, straightforward solution for temperature control without advanced programming features.
Key Features and Benefits
The Honeywell TH3210U2004 offers several key features that enhance user experience and home comfort. Its non-programmable design simplifies operation, making it ideal for those who prefer straightforward temperature control. The thermostat features an easy-to-read digital display with backlit buttons for clear visibility in low-light conditions. The Universal Mounting System (UWP) ensures easy installation and compatibility with most standard wiring setups, reducing the need for additional adapters. It supports up to 2 heat and 1 cool stages for heat pumps and 1 heat and 1 cool stage for conventional systems, providing flexible compatibility. Energy efficiency is a priority, with a focus on maintaining optimal temperatures while minimizing energy consumption. The included decorative cover plate helps conceal any wall imperfections, ensuring a clean and professional installation. These features make the Honeywell TH3210U2004 a reliable and user-friendly choice for basic heating and cooling needs.

System Requirements and Compatibility
The Honeywell TH3210U2004 requires 20-30 Vac, 50/60 Hz, and supports up to 2 heat/1 cool stages for heat pumps and 1 heat/1 cool for conventional systems. It is compatible with most standard wiring setups and operates within a humidity range of 5-90% RH, non-condensing.
Checking System Compatibility
To ensure the Honeywell TH3210U2004 works seamlessly with your HVAC system, verify its compatibility with your setup. First, check the voltage requirements (20-30 Vac) and frequency (50/60 Hz). This thermostat supports up to 2 heat/1 cool stages for heat pumps and 1 heat/1 cool for conventional systems. Review your wiring configuration to match the terminal designations (e.g., R, W, Y, G, C). If necessary, use the optional cover plate to hide any gaps from previous installations. Compatibility with most standard systems ensures reliable operation. Always refer to the user manual for specific guidelines tailored to your HVAC setup. Proper compatibility ensures optimal performance and avoids installation issues. Take time to verify these details before proceeding with installation.
Understanding Electrical Requirements
Before installing the Honeywell TH3210U2004, ensure your system meets the electrical requirements. The thermostat operates on 20 to 30 Vac and supports both 50 and 60 Hz frequencies. It is compatible with systems requiring up to 2 heat/1 cool stages for heat pumps and 1 heat/1 cool for conventional systems. The device requires a C-wire for power, though it can function without one using the optional battery-powered setup; Verify that your HVAC system’s wiring matches the thermostat’s terminal connections (R, W, Y, G, C). Proper electrical connections are crucial for reliable operation. Always turn off power at the breaker before handling wires to ensure safety. Refer to the user manual for detailed specifications and wiring diagrams to avoid any mismatches or installation errors.
Unboxing and Inventory
The Honeywell TH3210U2004 package includes the T3 Pro thermostat, UWP mounting system, decorative cover plate, screws, and anchors for a seamless installation experience.
Unboxing the Thermostat
When you unbox the Honeywell TH3210U2004 thermostat, you’ll find the T3 Pro thermostat unit, a UWP mounting system, a decorative cover plate, screws, and anchors. Start by carefully opening the package and inspecting each component to ensure all items are included and undamaged. The thermostat itself is compact, with a size of 4.72 inches in height and 5.9 inches in width, making it a great fit for most standard installations. The UWP mounting system is designed for easy installation and compatibility with various wall types. The decorative cover plate is optional but useful for covering any paint gaps or marks left by a previous thermostat. Take a moment to familiarize yourself with each part before proceeding to the installation steps. Proper organization of these components will streamline the setup process and ensure a smooth experience.
Verifying Included Components
Before proceeding with the installation, it’s essential to verify that all components of the Honeywell TH3210U2004 thermostat are included in the package. Carefully unpack and inspect each item to ensure nothing is missing or damaged. The package should contain the T3 Pro thermostat unit, the UWP mounting system, a decorative cover plate (small size), screws, and plastic anchors. Additionally, check for any installation instructions or quick start guides that may be provided. If you notice any missing or damaged components, contact Honeywell customer support immediately for assistance. This step ensures that you have everything needed for a smooth installation process. Proper verification prevents delays and ensures all parts are accounted for before starting the setup. Take your time to organize the components neatly, as this will make the installation process more efficient and stress-free.

Installation Steps
Follow these steps to install the Honeywell TH3210U2004 thermostat: turn off power, remove the old thermostat, prepare the site, mount the new device, and connect wires carefully.
Preparing the Installation Site
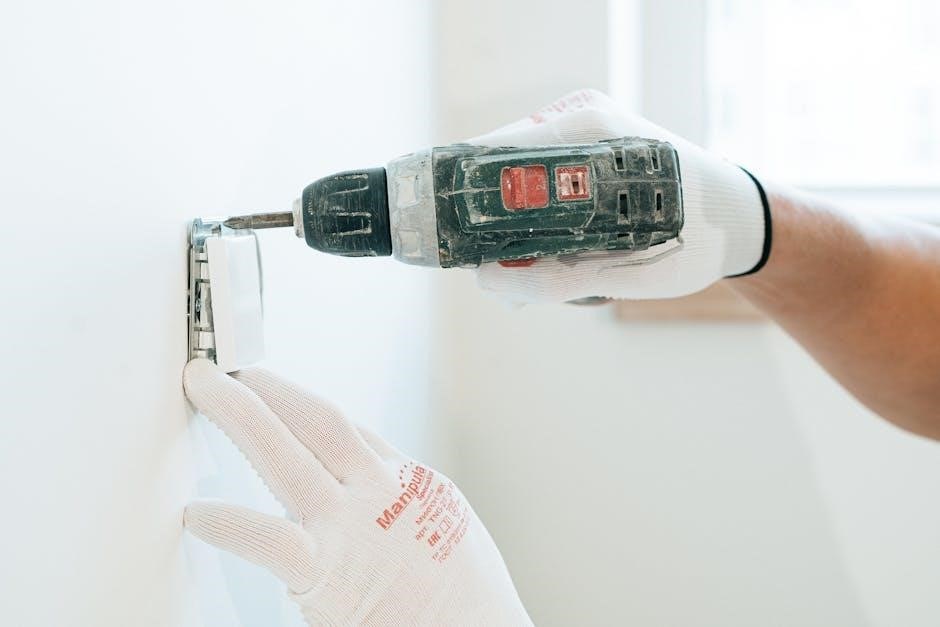
Before installing the Honeywell TH3210U2004 thermostat, ensure the installation site is ready. Turn off the power to the HVAC system at the circuit breaker or fuse box to avoid electrical hazards. Remove the old thermostat carefully, taking note of the wiring connections for reference. Clean the wall area where the new thermostat will be mounted to ensure proper adhesion of the mounting system. If necessary, use the optional decorative cover plate to conceal any paint gaps or marks left by the previous thermostat. Ensure all tools, such as a screwdriver and wire strippers, are within reach. Proper preparation ensures a smooth and safe installation process, preventing potential issues down the line.
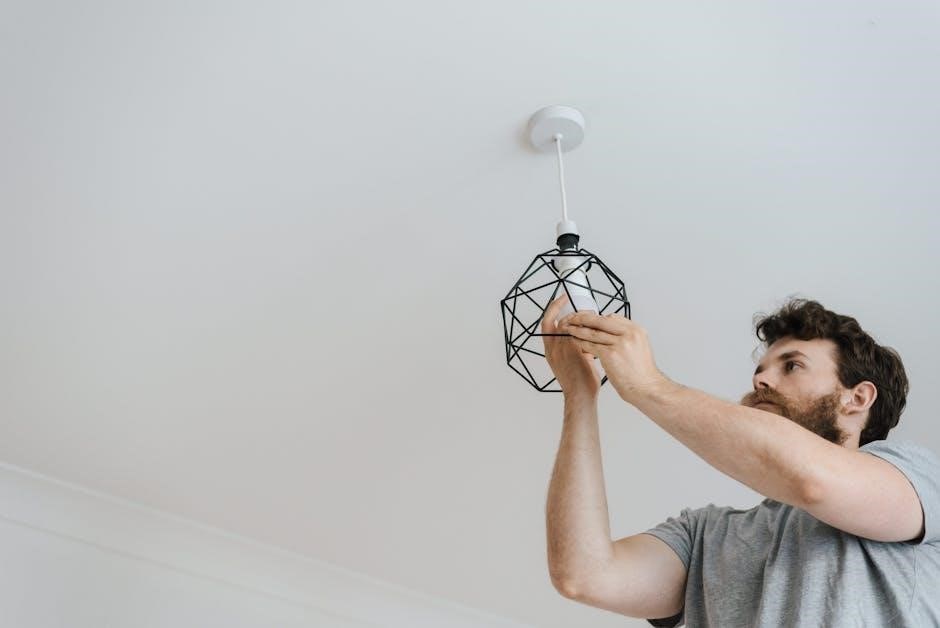
Making the Mounting
Mounting the Honeywell TH3210U2004 thermostat securely is essential for proper functionality. Begin by attaching the UWP (Universal Wall Plate) mounting system to the wall using the provided screws and anchors. Ensure the mounting plate is level to guarantee a straight installation. If necessary, use the decorative cover plate to cover any gaps or marks from the previous thermostat. Once the mounting plate is securely fastened, attach the thermostat to it by aligning the tabs and gently snapping it into place. Make sure the thermostat is firmly seated to avoid any movement or misalignment. Proper mounting ensures the thermostat operates accurately and maintains a sleek appearance. Refer to the user manual for specific mounting hardware and alignment instructions to complete this step effectively.
Connecting the Wires
Connecting the wires correctly is crucial for the Honeywell TH3210U2004 thermostat to function properly. Start by identifying each wire using the standard color coding: red for power (R), yellow for cooling (Y), white for heating (W), green for fan (G), and blue for common (C). Ensure the power is off at the breaker before connecting any wires. Attach the corresponding wires to the terminal designations on the thermostat, matching the colors to the correct terminals. Gently secure the wires to prevent loose connections. Double-check the wiring configuration against the user manual to avoid errors. Proper wiring ensures safe and efficient operation of the thermostat, preventing potential issues like improper heating or cooling. Once all connections are secure, turn the power back on and test the system to confirm everything works as expected.
Wiring and Connections
Proper wiring is essential for optimal performance and safety. The Honeywell TH3210U2004 features a universal mounting system, ensuring compatibility with various HVAC systems and correct connections.
Understanding Wire Color Coding
Understanding wire color coding is crucial for safe and correct installation of the Honeywell TH3210U2004 thermostat. Each wire color typically corresponds to a specific function:
- Green wire: Fan connection, controlling the blower motor;
- Red wire: Power source, often connected to the heating system’s power.
- Yellow wire: Cooling stage, typically for air conditioning systems.
- White wire: Heating stage, used for heating systems.
- Blue wire: Common or return wire, essential for completing the circuit.
While these color codes are standard, variations may occur. Always refer to the user manual or consult a professional if unsure to avoid system damage or safety hazards.
Terminal Designations and Connections
The Honeywell TH3210U2004 thermostat has specific terminal designations that must be correctly connected to ensure proper system operation. The terminals are labeled as follows:
- R: Power supply (24V AC) from the heating/cooling system.
- W: Heating stage (typically white wire).
- Y: Cooling stage (usually yellow wire).
- G: Fan operation (green wire).
- C: Common wire (blue or black wire) for completing the circuit.
Ensure the wires are securely connected to the corresponding terminals. Some systems may require a jumper between R and Rc for proper operation. Always refer to the user manual or consult a licensed professional if unsure about the connections. Proper terminal connections are critical for safe and reliable thermostat performance.
Best Practices for Wiring
When installing the Honeywell TH3210U2004, follow best wiring practices to ensure safety and functionality. Always turn off the power at the circuit breaker before starting work. Verify the wiring diagram in the manual matches your system setup. Use the correct gauge and color-coded wires to maintain consistency. Secure all connections firmly to avoid loose wires, which can cause malfunctions. If replacing an old thermostat, carefully label existing wires before disconnecting them. For systems requiring a common wire, ensure it is properly connected to the ‘C’ terminal. Avoid over-tightening terminal screws to prevent damage. Double-check all connections before restoring power. Consulting a licensed electrician is recommended if you encounter complex wiring configurations or uncertainties.
Configuration and Setup
The Honeywell TH3210U2004 setup involves initial configuration through the menu, allowing users to navigate system modes and set schedules. Refer to the user manual for detailed guidance on operation, troubleshooting, and advanced settings to ensure optimal performance.
Initial Setup and Configuration
After installation, the Honeywell TH3210U2004 requires initial setup to tailor its operation to your HVAC system. Begin by turning on the power at the breaker box and ensuring the thermostat display lights up. Using the menu button, navigate through system modes to select heating or cooling options. Set your preferred temperature and fan settings using the up and down buttons. The thermostat also allows you to choose between automatic or manual fan operation. For systems with heat pumps, ensure the configuration matches your equipment. Refer to the user manual for specific instructions on configuring advanced features like schedule settings or compatibility with multi-stage systems. Proper initial setup ensures efficient performance and comfort in your home.
Navigating the Menu
Navigating the menu on the Honeywell TH3210U2004 thermostat is straightforward. Press the Menu button to access the main settings. Use the up and down buttons to scroll through options like system mode, temperature settings, and fan operation. The Mode button allows you to cycle between heating, cooling, and off modes. To adjust temperature, press the up or down buttons until your desired setpoint is displayed. For fan settings, navigate to the fan menu and select Auto or On to control airflow. The menu is intuitive, with clear labels for each function. If you need to exit without saving changes, press the Menu button again to return to the home screen. This user-friendly interface ensures easy customization of your comfort settings. Refer to the user manual for detailed instructions on advanced menu options.
Setting Up Schedules
Although the Honeywell TH3210U2004 is a non-programmable thermostat, it still allows for basic schedule-like adjustments. Press the Menu button and navigate to the temperature settings using the up and down buttons. Set your desired temperature for heating or cooling modes. While it doesn’t support advanced scheduling, you can manually adjust the setpoints at different times of the day. For consistent comfort, set the fan to Auto mode, which operates only when heating or cooling is active. To maintain energy efficiency, consider setting the temperature slightly lower in winter and higher in summer when the space is unoccupied. The thermostat’s intuitive interface makes it easy to customize your comfort settings, even without programmable features. Refer to the user manual for additional tips on optimizing temperature control. This ensures efficient energy use while maintaining comfort. Always turn off the power before making electrical adjustments. If unsure, consult the installation guide or contact customer support. The Honeywell Home app may also offer remote scheduling options, depending on your system’s compatibility. This thermostat is designed to simplify your experience while providing essential controls.
Advanced Configuration Settings
The Honeywell TH3210U2004 offers several advanced settings to optimize performance. Access these by navigating to the Menu, then scrolling to Advanced Settings. Adjust temperature differential to minimize frequent cycling, ensuring stable comfort. Set the fan mode to Auto or On for continuous airflow. Configure system mode preferences, such as prioritizing heating or cooling. Enable adaptive recovery to pre-cool or pre-heat for energy efficiency. Adjust temperature limits to prevent extreme settings. Set display brightness and units (°F/°C). These settings enhance comfort and efficiency without requiring programming. Refer to the user manual for detailed instructions to avoid errors. Always power down before making electrical changes. For complex adjustments, consult the manual or contact support. These advanced options allow customization to meet specific needs, ensuring optimal performance and energy savings. Proper configuration is key to maintaining system reliability and efficiency.

Testing and Quality Assurance
Post-installation testing ensures reliable performance. Verify thermostat operation, temperature accuracy, and system response. Check heating, cooling, and fan modes. Test scheduling functionality and wireless connectivity if applicable. Ensure all features function correctly for optimal comfort and efficiency.
Post-Installation Testing
Once the Honeywell TH3210U2004 is installed, perform a thorough system test to ensure functionality. Start by verifying power to the thermostat and checking the display for proper operation. Test heating, cooling, and fan modes to confirm they activate correctly. Check temperature accuracy by comparing the thermostat reading with a reliable external source. If applicable, test wireless connectivity and remote access features. Ensure all scheduled settings work as intended and that the system responds appropriately to temperature changes. Verify that the thermostat cycles on and off within the expected range and that there are no unusual noises or malfunctions. Finally, review the user manual for any additional tests or calibrations required to optimize performance and ensure reliable operation.
Troubleshooting Common Issues
Common issues with the Honeywell TH3210U2004 may include display malfunctions, unresponsive buttons, or incorrect temperature readings. First, ensure the thermostat is properly powered and wires are securely connected. If the display is blank, check the circuit breaker or fuse. For unresponsive buttons, restart the thermostat by removing and reinserting the batteries or resetting it. If temperature readings are inaccurate, calibrate the thermostat according to the user manual. Addressing these issues promptly ensures optimal performance and comfort. Always refer to the user manual for detailed troubleshooting steps or contact customer support for further assistance. Regular maintenance and software updates can prevent many common problems, ensuring reliable operation over time.
Maintenance and Support
Regularly clean the thermostat to prevent dust buildup and ensure optimal performance. Check for software updates and refer to the user manual for troubleshooting guidance. Honeywell offers customer support for assistance.
Cleaning and Maintaining the Thermostat
Regular cleaning is essential to ensure the Honeywell TH3210U2004 thermostat operates efficiently. Use a soft, dry cloth to wipe the display and exterior, avoiding harsh chemicals or liquids. For internal components, gently brush away dust with a small, dry paintbrush. Ensure the thermostat is powered off before cleaning to prevent damage. Maintenance also involves checking for software updates, which can enhance functionality and fix issues. Refer to the user manual for detailed cleaning instructions and troubleshooting tips. Proper care extends the lifespan and performance of the device, ensuring accurate temperature control and reliable operation. By following these steps, you can keep your thermostat in optimal condition.
Software Updates and Firmware
Keeping your Honeywell TH3210U2004 thermostat updated with the latest software ensures optimal performance, new features, and bug fixes. Regularly check for firmware updates through the thermostat’s menu or by visiting Honeywell’s official website. Updates can typically be downloaded and installed via a computer or directly through the device, depending on the model. Always follow the instructions provided in the user manual to avoid any disruption during the update process. Failure to update may result in compatibility issues or reduced functionality. By staying current with the latest firmware, you ensure your thermostat operates efficiently, providing accurate temperature control and enhanced system integration. Regular updates also improve security and reliability, making your home comfort system more robust and dependable over time.
Customer Support and Resources
Honeywell provides comprehensive customer support and resources to ensure a smooth experience with the TH3210U2004 thermostat. Visit the official Honeywell Home website to access user manuals, troubleshooting guides, and installation videos. For direct assistance, contact Honeywell’s customer support team via phone or email. Additionally, the Honeywell Home website offers detailed FAQs, warranty information, and software update instructions. Users can also register their product online to receive updates and notifications. For further guidance, Honeywell provides interactive tools and step-by-step installation instructions. If issues arise, the support team is available to address concerns promptly. By leveraging these resources, users can maximize the functionality and longevity of their thermostat. Honeywell’s commitment to customer satisfaction ensures reliable support for any installation or operational needs.
Energy-Saving Tips
Maximizing energy efficiency with the Honeywell TH3210U2004 thermostat involves simple yet effective practices. Start by adjusting temperature settings based on occupancy and season. Lower the temperature during winter when the house is unoccupied and raise it in summer. Utilize the thermostat’s fan mode to circulate air without unnecessary heating or cooling. Regularly clean the thermostat to ensure accurate temperature readings and maintain proper airflow. Schedule temperature adjustments manually during peak hours to reduce energy use. Consider upgrading to a programmable thermostat in the future for automated savings. Ensure the thermostat is placed away from drafts and windows for accurate readings. Use natural heating and cooling by opening curtains on sunny winter days and shading windows in summer. Consistent temperatures, rather than frequent changes, optimize efficiency. By following these tips, homeowners can significantly reduce energy consumption while maintaining comfort.
The Honeywell TH3210U2004 installation manual guides users through successful setup, ensuring optimal performance and energy efficiency for a comfortable home environment. Proper installation and configuration are key to its functionality.
Key Takeaways
The Honeywell TH3210U2004 installation process requires careful preparation and adherence to safety guidelines. Always turn off power at the breaker before starting. Use the UWP mounting system for secure installation, ensuring compatibility with your HVAC setup. Proper wiring is essential, with clear labels for power, heating, and cooling connections. The thermostat supports up to 2 heat and 1 cool stages, making it versatile for various systems. Post-installation testing ensures functionality and comfort. Refer to the user manual for troubleshooting common issues and advanced configuration options. Regular maintenance, such as cleaning the display and updating firmware, ensures long-term performance. By following these steps, you can enjoy reliable temperature control and energy efficiency. Always consult the official Honeywell resources or customer support for additional assistance. Proper installation and configuration are key to maximizing the thermostat’s benefits.
Final Thoughts
The Honeywell TH3210U2004 installation manual provides a comprehensive guide for users to achieve a seamless setup and optimal performance. With its intuitive design and straightforward instructions, the thermostat is accessible to both DIY enthusiasts and professionals. The emphasis on safety, such as turning off power before installation, ensures a risk-free experience. The inclusion of detailed wiring diagrams and troubleshooting tips enhances user confidence. While the non-programmable nature may limit advanced scheduling, it simplifies operation for those prioritizing ease of use. Overall, the Honeywell TH3210U2004 is a reliable choice for homeowners seeking efficient temperature control. Proper installation and regular maintenance will ensure years of dependable service. For further assistance, Honeywell’s customer support and online resources remain invaluable. This thermostat balances functionality and simplicity, making it a practical addition to any home.
No Responses