Roper Washing Machine Manual: A Comprehensive Guide
Navigating appliance repair and usage hinges on accurate information; this manual provides essential guidance for Roper washer owners‚ ensuring optimal performance and longevity.
Understanding Your Roper Washer
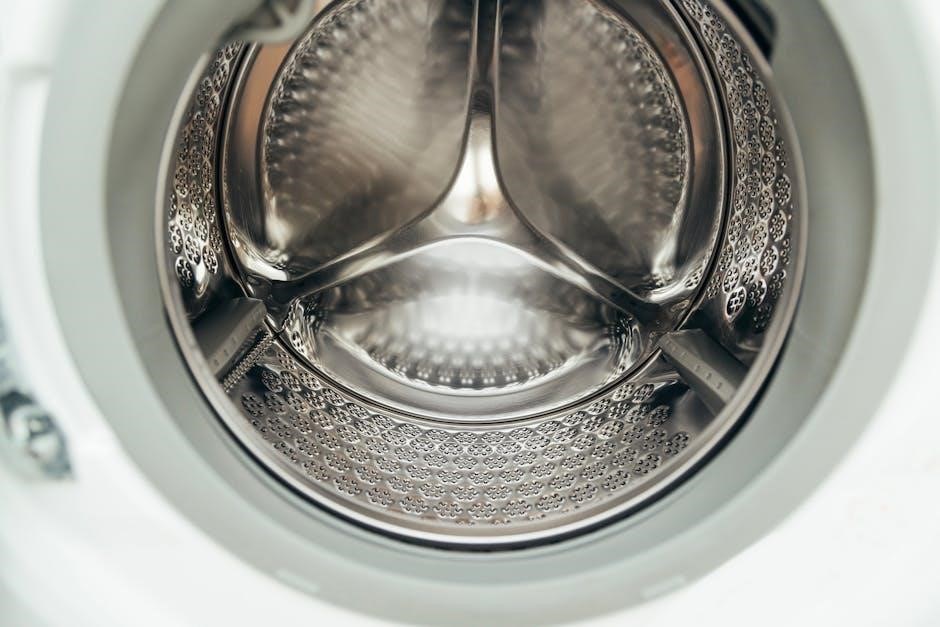
Your Roper washing machine is a complex appliance designed for efficient and reliable laundry care. Familiarizing yourself with its core components and operational principles is crucial for maximizing its lifespan and achieving optimal cleaning results. This section will delve into the fundamental aspects of your Roper washer‚ covering everything from its basic construction to the key features that differentiate it from other models.
Understanding the interplay between the various parts – the motor‚ pump‚ agitator (or impeller)‚ water inlet valves‚ and control board – will empower you to diagnose minor issues and perform routine maintenance. Knowing how these components work together will also help you interpret error codes and understand the instructions within this manual. Proper usage‚ guided by this understanding‚ prevents unnecessary wear and tear‚ ultimately saving you time and money on potential repairs.
Identifying Your Roper Model Number
Locating your Roper washing machine’s model number is the first step towards accessing specific support and replacement parts. This unique identifier is essential when consulting the manual‚ contacting customer service‚ or ordering components. The model number typically resides on a sticker or plate affixed to the appliance.
Common locations include inside the lid‚ around the door opening‚ or on the back panel of the washer. It’s a string of characters – a combination of letters and numbers – that precisely defines your machine’s configuration. Having this number readily available streamlines troubleshooting and ensures you receive the correct information for your specific Roper model. Without it‚ finding accurate guidance becomes significantly more challenging‚ potentially leading to incorrect repairs or incompatible parts.
Locating the Roper Washer Manual Online
In today’s digital age‚ accessing your Roper washing machine manual is often easier online than searching for a physical copy. Several websites specialize in appliance manuals‚ offering downloadable PDFs for various Roper models. A simple web search using “Roper washer manual” combined with your specific model number will yield numerous results.
Manufacturer websites‚ appliance parts retailers‚ and dedicated manual archives are excellent starting points. Be cautious when downloading from unfamiliar sources to avoid potential malware. Ensure the manual corresponds to your exact model number for accurate instructions. Online manuals offer the convenience of instant access and the ability to search for specific topics‚ making troubleshooting and understanding your washer’s features more efficient.
Safety First: Important Precautions
Prioritizing safety is paramount when operating your Roper washing machine. Always disconnect the power supply before performing any maintenance or repairs to prevent electrical shock. Never attempt to repair the appliance yourself if you are not comfortable working with electrical components; consult a qualified technician instead.
Keep children and pets away from the washing machine during operation. Do not overload the washer‚ as this can cause damage and create a safety hazard. Ensure proper ventilation to prevent the buildup of potentially harmful fumes. Regularly inspect the power cord for damage and replace it if necessary. Following these precautions will ensure safe and reliable operation of your Roper washer.
General Safety Warnings
To prevent injury and ensure safe operation‚ heed these general safety warnings. Never operate the Roper washing machine if the power cord or plug is damaged. Avoid using extension cords‚ as they can overheat and pose a fire risk. Do not immerse the appliance in water or expose it to excessive moisture.
Always supervise children when they are near the washing machine. Do not allow anyone to climb on or inside the appliance. If the washer begins to make unusual noises or vibrate excessively‚ stop it immediately and investigate the cause. Disconnect the power supply before cleaning or performing any maintenance. Adhering to these warnings will help maintain a safe environment.
Electrical Safety Guidelines
Prioritize electrical safety when installing and using your Roper washing machine. Ensure the appliance is properly grounded to prevent electric shock. Never attempt to repair electrical components yourself; always consult a qualified technician. Avoid operating the washer with wet hands or while standing in water.
Inspect the power cord regularly for damage and replace it immediately if necessary. Do not overload electrical circuits with the washing machine and other appliances. Disconnect the power supply before cleaning or performing any maintenance. Following these guidelines minimizes the risk of electrical hazards and ensures safe operation of your Roper washer.

Operating Your Roper Washing Machine
Mastering your Roper washer’s functions unlocks efficient cleaning; understanding the control panel‚ cycles‚ and settings ensures optimal results for every laundry load you process.
Control Panel Overview
The Roper washing machine control panel is designed for intuitive operation‚ though features vary slightly by model. Typically‚ you’ll find a cycle selector dial allowing you to choose pre-programmed washes like Normal‚ Delicate‚ Heavy Duty‚ and Quick Wash. Digital models boast electronic touch controls and LED displays for precise adjustments.

Temperature settings – Hot‚ Warm‚ and Cold – are usually selectable buttons or dial positions‚ influencing cleaning effectiveness and fabric care. A load size option lets you optimize water usage based on the amount of laundry. Additional buttons may include options for extra rinse‚ spin speed control‚ and soil level selection.
Familiarize yourself with the specific symbols and labels on your panel; the manual provides a detailed explanation of each function. Understanding these controls empowers you to customize washes for different fabrics and soil levels‚ maximizing cleaning performance and protecting your clothes.
Selecting Wash Cycles
Roper washing machines offer a variety of wash cycles tailored to different fabric types and soil levels. The ‘Normal’ cycle is ideal for everyday cottons and linens‚ providing a balanced wash and rinse. ‘Delicate’ cycles use gentler agitation for fragile items like lingerie and silk‚ preventing damage.
For heavily soiled items‚ the ‘Heavy Duty’ cycle offers extended wash times and increased agitation. A ‘Quick Wash’ cycle provides a faster‚ shorter wash for lightly soiled clothes when time is limited. Many models include specialized cycles like ‘Bulky Items’ for bedding and ‘Whites’ for brightening white fabrics.
Consult your Roper washer’s manual to understand the specific characteristics of each cycle; proper cycle selection ensures optimal cleaning and protects your garments from unnecessary wear and tear. Always consider fabric care labels before choosing a cycle.
Understanding Water Temperature Settings
Roper washing machines provide adjustable water temperature settings to accommodate various fabric types and cleaning needs. ‘Hot’ water is best for whites and heavily soiled items‚ effectively removing stains and killing bacteria‚ but can cause fading and shrinkage. ‘Warm’ water offers a balance between cleaning power and fabric protection‚ suitable for most colored clothes.
‘Cold’ water is ideal for delicate fabrics‚ dark colors‚ and preventing fading. It also saves energy. Always check garment care labels for recommended water temperatures; following these guidelines preserves the quality and appearance of your clothes.
Some Roper models feature a ‘Tap Cold’ setting‚ using the coldest water available from your plumbing. Proper temperature selection optimizes cleaning performance and minimizes fabric damage‚ extending the life of your wardrobe.
Using Detergent and Additives
Proper detergent usage is crucial for effective cleaning and preventing residue buildup in your Roper washer. Always use High Efficiency (HE) detergent if your machine is a front-load or HE top-load model; non-HE detergents create excessive suds‚ potentially damaging the machine;
Follow the detergent manufacturer’s recommendations for quantity‚ adjusting based on load size and soil level. Additives like fabric softener and bleach should be dispensed into the designated compartments‚ avoiding direct contact with clothes.
Overusing detergent or additives can lead to performance issues and require extra rinsing. Liquid detergents are generally preferred‚ but powder detergents can be used if dissolved properly. Regularly clean the detergent dispenser to prevent clogs and ensure optimal performance.
Maintenance and Troubleshooting
Regular upkeep extends your Roper washer’s life‚ while prompt troubleshooting resolves issues quickly; this section details cleaning procedures and common problem solutions.
Cleaning Your Roper Washer
Maintaining a clean washing machine is crucial for optimal performance and preventing unpleasant odors. Regularly cleaning your Roper washer involves several key steps. First‚ wipe down the exterior surfaces with a damp cloth and mild detergent. Pay attention to the control panel and door or lid.
For the interior‚ run an empty hot water cycle with a washing machine cleaner (follow the cleaner’s instructions carefully). Alternatively‚ you can use a cup of white vinegar added directly to the drum. This helps to dissolve detergent buildup and mineral deposits.
Don’t forget the rubber door seal (front-load washers); wipe it down to remove any mildew or debris. Inspect and clean the detergent dispenser regularly to prevent clogs. A clean washer ensures cleaner clothes and a longer appliance lifespan‚ contributing to overall household hygiene.
Cleaning the Detergent Dispenser
A clogged detergent dispenser can hinder your Roper washer’s performance and lead to residue on your clothes. Regular cleaning is essential. Most Roper models feature a removable dispenser drawer; consult your specific manual for removal instructions.
Once removed‚ rinse the dispenser thoroughly under warm water‚ using a soft brush to dislodge any hardened detergent or fabric softener buildup. Pay close attention to the individual compartments for each product. For stubborn residue‚ soak the dispenser in a solution of warm water and vinegar for approximately 30 minutes before scrubbing.
Ensure the dispenser is completely dry before reinserting it into the washer. A clean dispenser guarantees proper detergent distribution‚ maximizing cleaning effectiveness and preventing potential issues with your wash cycles. Consistent maintenance extends the life of this component.
Troubleshooting Common Issues: Washer Won’t Start
If your Roper washer fails to start‚ several potential causes should be investigated. First‚ verify the power cord is securely plugged into a functioning outlet. Test the outlet with another appliance to confirm it’s receiving power. Check your home’s circuit breaker or fuse box; a tripped breaker or blown fuse will prevent operation.
Next‚ ensure the washer lid switch is properly engaged. This safety feature prevents operation when the lid is open. If the switch is faulty‚ it may need replacement. Also‚ confirm the start/pause button has been firmly pressed and the selected cycle is appropriate.
If these steps don’t resolve the issue‚ consult the error code display (if applicable) or refer to the full manual for more advanced troubleshooting steps. A professional repair may be necessary if the problem persists.
Troubleshooting Common Issues: Washer Won’t Drain
A Roper washer that won’t drain can lead to standing water and potential damage. Initially‚ check the drain hose for kinks or obstructions. Ensure it isn’t bent sharply or clogged with lint or debris. Verify the drain hose is properly inserted into the standpipe and isn’t pushed in too far‚ which can cause siphoning.
Next‚ inspect the drain pump filter. This filter catches lint‚ buttons‚ and other small items that could block drainage. Locate the filter (usually behind a small access panel) and carefully clean it.
If the issue persists‚ the drain pump itself may be faulty and require replacement. A clogged pump impeller is also a possibility. Consult the full Roper washer manual for specific instructions and diagrams related to your model.
Troubleshooting Common Issues: Washer is Noisy
Excessive noise during a wash cycle can indicate several issues with your Roper washer. First‚ ensure the washer is level. An uneven machine can vibrate significantly during operation. Adjust the leveling feet until the washer sits firmly on the floor.
Check the load balance. An unbalanced load can cause loud banging. Redistribute the clothes evenly inside the drum. Also‚ inspect for any foreign objects – coins‚ buttons‚ or small toys – trapped between the inner and outer tubs.
A worn drive belt or failing drum bearings can also generate noise. These components may require professional inspection and replacement. Refer to your Roper washer manual for detailed diagrams and repair guidance.
Advanced Features & Repair Information
Delving deeper‚ this section unlocks complex diagnostics‚ repair procedures‚ and detailed parts information for skilled users seeking comprehensive Roper washer maintenance.
Roper Washer Error Codes and Meanings
Decoding error messages is crucial for efficient troubleshooting. Roper washing machines utilize a series of error codes to signal specific malfunctions‚ allowing for targeted repairs. A common code‚ “F01‚” often indicates a water inlet valve issue‚ preventing the washer from filling correctly. Conversely‚ “F02” typically signals a problem with the drain pump‚ leading to incomplete draining.
Other frequently encountered codes include: “F03” – lid switch malfunction (washer won’t start)‚ “F04” – over-sudsing detected (reduce detergent)‚ and “F05” – unbalanced load (redistribute clothes). More advanced models may display codes related to motor function‚ sensor failures‚ or communication errors within the control board.
Consulting the complete error code list within your specific Roper washer manual is paramount. Ignoring these signals can lead to further damage and more costly repairs. Always disconnect the power before attempting any diagnostic or repair work.
Replacing the Drive Belt
A worn or broken drive belt prevents the washer drum from spinning. Replacing it requires careful disassembly. First‚ always disconnect power! Access the belt typically involves removing the back panel of the washing machine. Locate the motor‚ tensioner pulley‚ and the drive belt itself.
Release the tension on the old belt using the tensioner‚ then carefully remove it. Note the belt’s routing around the pulleys – a diagram or photo is helpful! Install the new belt‚ ensuring it’s properly seated in the grooves of the motor pulley and the drum.
Re-engage the tensioner and verify the belt runs smoothly. Reattach the back panel. Before restoring power‚ manually rotate the drum to confirm proper belt function. A correctly installed belt will ensure quiet and efficient operation.
Replacing the Water Inlet Valve
A faulty water inlet valve prevents the washer from filling properly. Begin by disconnecting power and water supply lines. Locate the valve – usually at the back of the machine where the hoses connect. Disconnect the hoses and electrical connectors.
Note the hose and wire positions before removal for correct reassembly. Unscrew the old valve from the washer cabinet. Install the new valve‚ ensuring a tight seal to prevent leaks. Reconnect the hoses and electrical connectors‚ matching the original configuration.
Turn on the water supply and check for leaks around the valve connections. Restore power and run a short wash cycle to verify proper filling. A functioning valve ensures adequate water flow for effective cleaning.
Understanding Roper Washer Parts Diagrams
Roper washer parts diagrams are invaluable for repairs and maintenance. These detailed illustrations showcase every component‚ from the agitator to the water pump‚ with corresponding part numbers. Locate diagrams online via the Roper website or appliance parts retailers‚ using your specific model number for accuracy.
Diagrams simplify identifying the correct replacement parts‚ preventing incorrect orders and wasted time. They also aid in understanding how components interact‚ assisting with complex repairs. Pay attention to exploded views‚ which clearly show assembly order.
Utilize diagrams alongside repair guides for a comprehensive understanding of the repair process. Familiarity with these diagrams empowers you to tackle repairs confidently and efficiently‚ saving on service costs.
Additional Resources
For further assistance‚ explore Roper’s official support channels and reliable parts suppliers; expert help and genuine components are readily available online.
Roper Customer Support Contact Information
Reaching Roper customer support is crucial for resolving complex issues or obtaining personalized assistance with your washing machine. While direct contact information can vary‚ a primary resource is the Whirlpool Corporation‚ as Roper is a Whirlpool brand. You can typically find support options on the Whirlpool website (www.whirlpool.com). Look for a “Contact Us” or “Support” section‚ then navigate to Roper appliances.
Phone support is often available during standard business hours. Be prepared to have your model number readily available‚ as this will expedite the process. Online chat support may also be offered‚ providing a convenient way to connect with a representative. Additionally‚ many frequently asked questions (FAQs) and troubleshooting guides are available online‚ potentially resolving your issue without needing to contact support directly. Remember to check the warranty information for specific support terms and conditions related to your Roper washer.
Finding Replacement Parts
Securing genuine Roper replacement parts is vital for maintaining your washing machine’s performance and safety. Several online retailers specialize in appliance parts‚ offering a wide selection specifically for Roper models. Websites like AppliancePartsPros.com and RepairClinic.com are excellent starting points‚ allowing you to search by model number for accurate matches.
Always prioritize using your Roper washer’s model number when searching for parts. This ensures compatibility and avoids ordering incorrect components. Local appliance repair shops may also stock common parts or be able to order them for you. When purchasing‚ verify the part’s authenticity and read customer reviews to gauge quality and reliability. Consider comparing prices across different vendors to find the best deal‚ but don’t compromise on quality for cost savings.
Warranty Information for Roper Washing Machines
Roper washing machines typically come with a limited warranty covering defects in materials and workmanship. The standard warranty period is generally one year for parts and labor‚ beginning from the original purchase date. However‚ specific warranty terms can vary depending on the model and retailer. It’s crucial to retain your proof of purchase – the original sales receipt – as it’s required to make a warranty claim.
Extended warranties are often available for purchase‚ offering coverage beyond the initial one-year period. These extended plans can provide peace of mind‚ protecting against potential repair costs. Carefully review the terms and conditions of any extended warranty before purchasing‚ paying attention to what is covered and any associated deductibles. Registering your appliance with Roper after purchase can streamline the warranty claim process if needed.
No Responses